Monday, October 28, 2013

DIY: Lia's Headboard

My roommate Lia loved the headboard that I made for myself and asked me to make one for her. My only request was that she help me. In fact, that's the only rule I stick to. If you want something, then you get to spend "QT" (quality time) with me and we'll do it together. 

Lia and I went early to Home Depot and picked out "fence wood" for her headboard. We had everything cut (including the plywood) and then brought it back to our apartment. 

Side-note: remember your transportation. Thankfully HD in Marina Del Rey was used to people with small cars. Thank goodness for shrink-wrap! 


We built the frame (the exact same measurements/layout as my first headboard) and then attached the plywood on top.


Here's where the story gets funny. I absolutely love recycling wood... so I found a large crate in an alley and brought it with us to use for her headboard. The only thing is that you have to take out all of the rusty nails in order to use the wood. As we were pulling out the nails, my finger slipped and a nail went straight through my thumb. I actually saw the nail on the backside of my thumbnail...

Below is the photo of us before we started sawing, drilling, removing nails and getting tetanus. 


We continued on and ended up with a beautiful 1/8th reclaimed wood headboard and me with a bum thumb. 


The next day however, I woke up with a slight fever, headache and back pain. I called my mom and asked her to look in my medical file for my last tetanus shot. It was out of date, which means that I could have been showing signs of tetanus... or I could have just been hallucinating. Either way I wasn't going to risk it. Lia, being a good sport and supporting my decision to get a shot, decided to go with me and get a booster. 


We then returned to the headboard, sanded down the fence wood and carried it into her bedroom. 


It looks absolutely beautiful in her new room and she loves it! 


Wednesday, October 23, 2013

Drip Painting

This was one of my favorite crafts so far, because the turnout was totally out of my hands. 

Prep: find squirt bottles (I found mine at Walmart) and "mix" your 2/3 paint + 1/3 water mixture in it. Once you have your mixture... just squeeze with the nose pointed down towards the canvas. Let the paint run either as long or short as you'd like.  


I decided to do four different colors, so it took a bit longer to finish (because of drying time, but I'm very happy with how it turned out... 


"Dripping in Gold" wooden artwork.


I just love it on the wall next to my shelf :) 


Monday, February 25, 2013

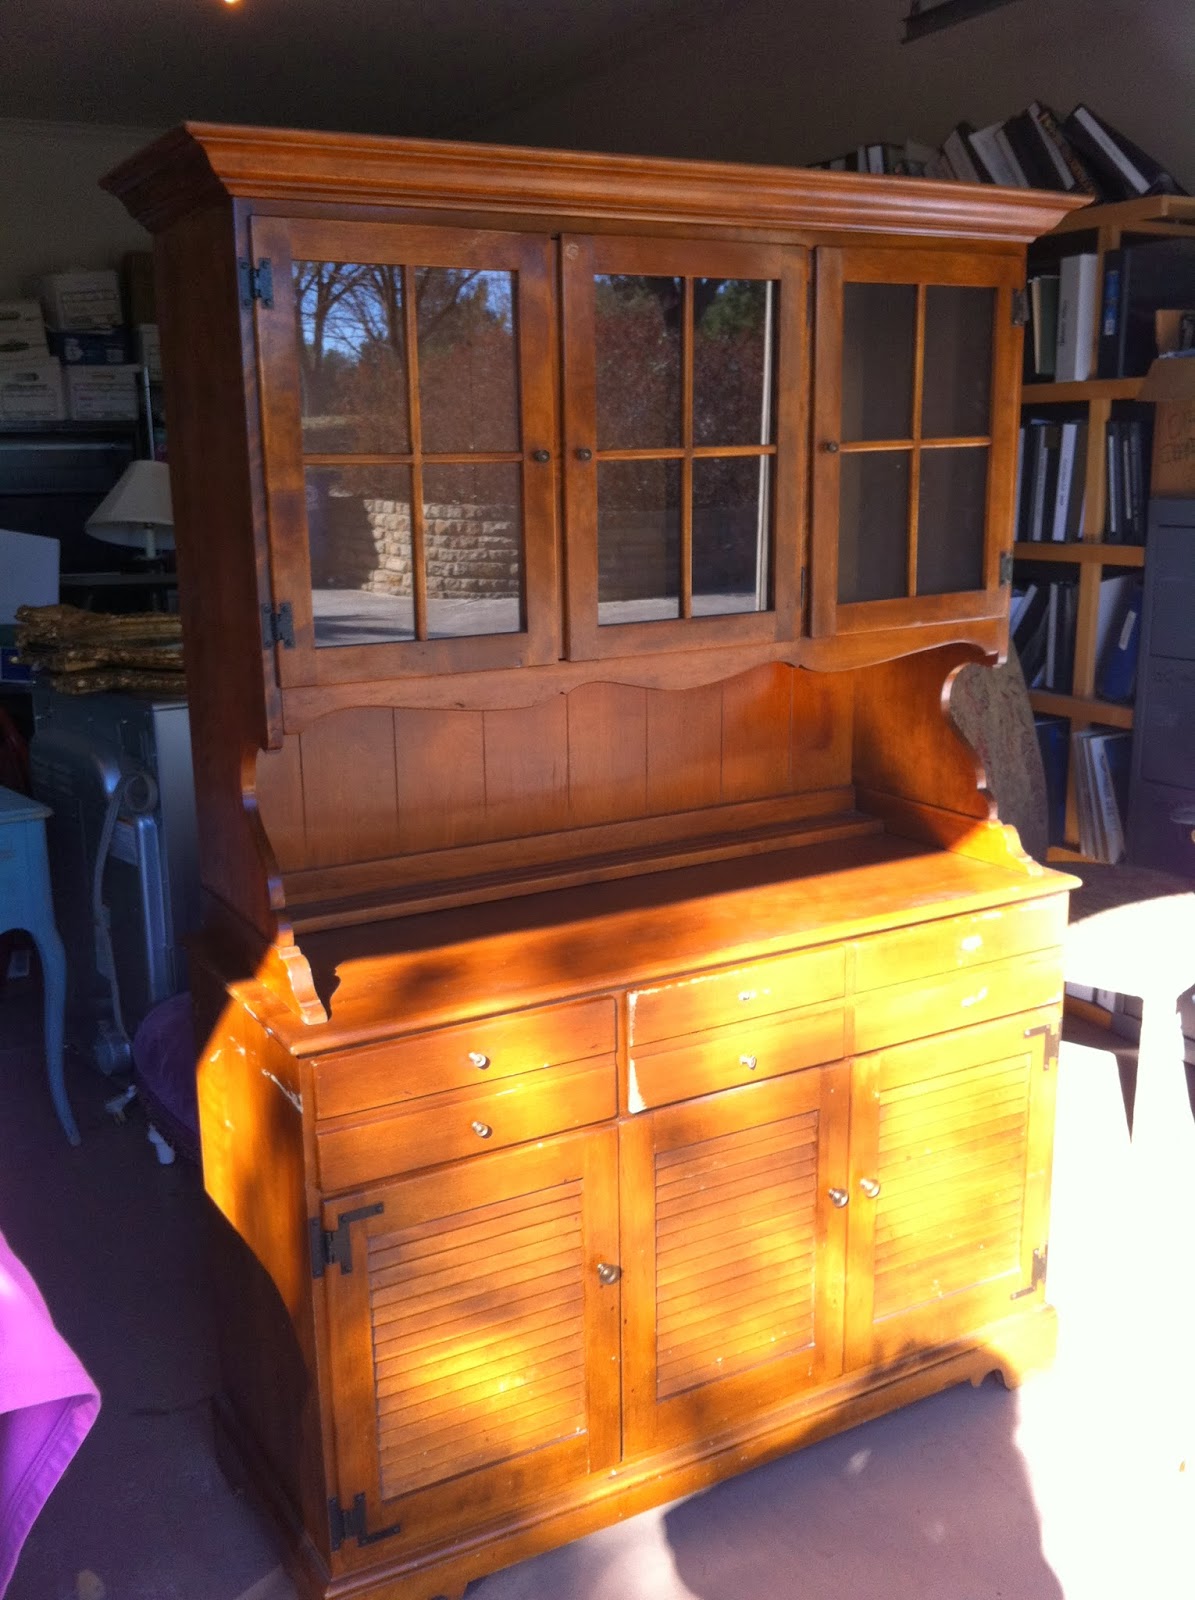
Upcycled: The Hutch

My Grandfather willed me a few of his furniture pieces upon his passing and one of the items was this beautiful Ethan Allen hutch: 


I really loved the natural wood look of the piece, but it didn't quite go with my style and the rest of the furniture in my house, so I decided to "upcycle" it. 

First: sand down the entire surface of the hutch and tape off the parts that you do not want to paint. 

(Originally I wanted to keep the inside of the doors natural wood, but once it was painted, I loved the white so much that I decided to use more paint then less).


After sanding, prime the entire piece, let dry and gently sand again. 
(Photo: white primer)


"Lilly" by Valspar -- my favorite "white" ... it has an off-white feel to it. Not too yellow, not too white. 


After painting all over, sand down the places where you want your piece to look "worn."


Finish off with cute knobs and you're done! Enjoy your new upcylced focus point!! 


Thursday, February 14, 2013

A Little Piece of Texas

My boss gave me a leftover gift basket from the Holidays. This was a "Texas" themed gift basket and therefore it had a Texas shaped body. At first thought, I was thinking I could use it for it's original purpose--as a basket, but then I realized that there's so many other things I could do with it. 


So, I decided to do the "nail-string wrap" that floats around Pinterest since the wood was already in the shape of Texas! 

First Step: Unravel the basket weave. 


Second: after you have you're cut out, paint it whatever color you desire!


The start hammering nails close together. For this I chose #10 carpet nails because they are dark and every nail is just a bit different than the one before! 


Once you're finished with the border, choose the placement (and symbol) of the center holster. 


Tack the symbol in place and then start hammering around the border.  


Once you've completed your center symbol, start to wrap your string. I chose to go with two different types of string: multicolored yarn and I went back over it with a traditional white string (the type that you would use to make a friendship bracelet).


String one is complete! 


String two: I decided to do string one straight and uniform and then string two I decided to go a bit crazy since it was the top layer!


And here's the final result! There's still a few nails I would like to adjust, and I need to fasten hangers on the back, but for now it's messy and unique like me and I'm happy with the turnout! 


Tuesday, February 12, 2013

Wine Crate Shelf @ Wedding


My shelf was used at a wedding this past month! It looked so beautiful in the vestibule with many decorative and commemorative items displayed! 


Thursday, January 24, 2013

Weddings!

It's almost that time of year again--Wedding Season! For me however, it's getting started a little earlier this year. Last year I wrote a post about wedding shower invitations and this weekend is the wedding of the same bride!

I never knew how much work actually goes into planning a wedding until this one because I am the maid of honor and I have had lots of responsibilities in the past few months! 

I've done lots of crafts, gone to tons of meetings, dress fittings and recently I've stayed up way too late crafting. Hopefully it will all be worth it once the day arrives!

Since I've been horrible about taking photos of the crafts, I have only two that I'm allowed to share with you. The bride doesn't want anything to be posted before the wedding because she wants it all to be a surprise!

One of my responsibilities has been decorating the "vestibule" or entrance room to the reception. For this we are using my wine crate shelf and a few other pieces of furniture as decoration. We are also doing photos, painted letters etc., etc. I can't go into detail or else I'd be in trouble, but it's going to look really vintage-chic!

To surprise the Bride and Groom, I have painted them a wedding chapel (we decided against a birdcage). I can't decide if I'm going to put wreaths on the doors or not. 

Here's the before and after!


Next week I will post a bit more showcasing the decorations and handmade items from this wedding!! 

Thursday, January 10, 2013

Christmas Gift Painting

One of my friends asked me this Christmas to make her something to give to her Mom. She had seen my picture of the words on canvas that I had painted several months ago and wanted me to do something similar. Except she said she would like it to be a painting of the Fruits of the Spirit and she gave me specific colors to use. 

I decided, however, that since the Fruits of the Spirit are so short, that it would be better to use different fonts, paints and sizes to take up the canvas she had purchased for me to use. 


I remembered this print I had seen a while back on Pinterest and I decided to show it to her. She said she loved it! 


The only problem was that she had purchased a square canvas instead of a rectangle canvas, so I knew the scale was going to be off a bit and that it wasn't going to be exact. Nevertheless, I decided to go for it! 

I had never painted block letters before. So, I knew this was going to be a challenge for me. If you read my post about the words on canvas, you heard me express the patience it takes to paint words. This one required even more patience!! 

First, I had to sketch out the block letters on the canvas and then I painted the letters one color at a time. 


All in all it took me about 5 hours to paint. Definitely a labor worth doing because I can now say I know all of the Fruits by heart!! 


I don't know if I'm in love with the final product. There was one font in particular that I am not a big fan of. But my friend said that her mom loved it! She paid me probably too much for it, but it was still nice to be commissioned to do something and get paid for it. 

For her moms birthday we are going to build her something out of old barn wood. I'm looking forward to it because wood and I are much better friends that paint and I :)