Monday, October 29, 2012

Upcycled: Free Logs Turned Into Fantastic Centerpieces & A Present

One of the best things about being nice, is that if you're nice to strangers, 
they will generally be nice back to you :)

I was driving to my boss' house one day and I passed by some guys cutting down a few trees for one of his neighbors. After they cut the tree into smaller pieces, they placed it all into a pile across the street. I parked my car, went over and started asking about the wood--all in hopes of asking the land owner if I could take some of the discarded wood. The workers informed me that the city dump would come by tomorrow and that the wood was mine for the taking. I grabbed three large logs (pictured below) and threw them into my trunk.


A few weeks later, my oldest brother and I spent a few hours with the wood and a chainsaw to cut the logs into 2 1/2-3 inch thick pieces. We got about 18 smaller pieces and three large pieces out of the logs. 


(Pay attention to the tall one of the left--I'm going to use it later on for a gift for the bride and groom)


Here's a close up of the sizes. They all varied because I didn't want the tables to look too uniform--My hope for the dinner party was to make the tables look styled, but individual.

Next, I wanted to create something fun for the bride and groom.The largest leftover piece of wood was too tall to place on top of a table, so I decided to make it into an engraved doorstop for the couple. 


I wanted the doorstop to read "A + J" but I couldn't find my grandfathers' wood engraver, so I resulted to using an old trick that I learned in high school. You can achieve the same look by using regular wood matches. 


First you line up the matches in a row (or in the shape of whatever it is that you're trying to make) and then you use tape to hold the ends together. Try not to get too close to the ends of the match because you do not want to prevent the matches from burning. 


Place the line on the log in the location of the project area.


Set fire to the matches and let it burn for 3-5 seconds. 


Blow it out and remove. You should be left with something that looks like this: 


Continue repeating the steps until you have your final project!!

Here's what mine ended up looking like. The bride and groom loved it! The groom, however, wanted to know what his initial didn't come first haha. 


The dinner party ended up being a big success. My parent's think that event planning/wedding planning is my calling. They might be right. I did have a lot of fun planning and decorating.

Here's a pic of what the tables ended up looking like with all of the flowers, candles and wood cuts :)


Thursday, October 25, 2012

Upcycled: Purple Shirt

I used to work at Anthropologie for a second, part-time job, in addition to my full-time job. I worked there for over a year and a half and I have to say I am so grateful for all of the people who I worked with and all of the inspiration that floats around in the atmosphere. 

One day in the fall of last year, we received this shirt in a new shipment. 


I absolutely fell in love instantly with the colors because it has almost every one of my favorite colors in the pattern. I didn't, however, love the neckline. In fact when I first tried it on, I hated it. Something about having three holes in the chest area (one very deep and low--hint the middle) and I was a little uncomfortable with drawing attention to my chest. I ended up purchasing it because of the color pattern, but only wore it a few times in the past year. It was a few weeks ago that I was cleaning out my closet and I came up with an idea for a neckline adjustment using salvaged materials from things I was going to donate. 


One of the shirts I was going to donate was this babydoll (or long tank) with cream colored lace around the bottom of the shirt. I decided to cut off all of the lace from the tank and then cut out all of the holes on the purple shirt. My hope was to eventually give the purple top a more structured and vintage look.

What I ended up doing was first cutting out a square in the shirt, made what I'm going to call "edging" because I don't know the right terminology and then I attached the lace at the very end.


I think I have decided that I like when things aren't perfect. As you can see, I decided to do a zigzag pattern for the stitch and I used bright purple thread all so that the neckline would stand out a little more. The edging also isn't perfect because I made it all from teeny-tiny scraps from the square cut-out and then I also salvaged the edging from the original holes.  

After two hours on the sewing machine, I came up with this:

(I wore it to work this week and snapped this photo in the bathroom!)


All in all I am very happy with how it turned out. I love the colors and now it has a very unique neckline that doesn't draw attention to the crack between my boobs! Hah!


Thursday, September 13, 2012

Just for Fun: Invitations

Another little side thing that I like to do is play around in Photoshop--not just to edit photos.

This past week I have been working on invitations for a couples bridal shower that I am throwing in honor of a best friend from high school and her upcoming nuptials. 

The shower is going to be a laid back, outdoors, night time, barbecue with TVs located on the patio for football. The backyard is heavily treed and our plan is to have tree lights, Christmas lights, globes and candles to light up the yard--I think it's going to end up being very mystical. 

The brides colors for her wedding are plum, turquoise and then metallic silver and burlap additions.

With all of that in mind, I wanted the invitations to kinda show that it was going to be an outdoor dinner, pretty casual and of course, I wanted the invite to be unique and quirky like me!  

My favorite shower invite thus far was actually from the second to last wedding I was in. 
They were hand-drawn and then printed on card stock--pretty easy to do.   

My next favorite were done by hand as well, but they were hand painted with watercolor paints and then color copied--a little bit harder to do.

Both ideas involved one thing: drawing by hand.

So, I one day at work when I didn't have much to do, I sat down and started sketching a table. Once I had it to where I liked it, I scanned it into my computer and put it in photoshop.

After a few edits, here's what it turned out to look like:


Pretty cool, ehh?

The next task was to find a tree and chandelier that I liked and try to sketch that and then scan it in as well. The chandelier was pretty easy: 


But the tree on the other hand posed some problems for me. 

I ended up using a photo from google and then editing it in photoshop until I liked the way it looked: 


Then it came time for the text of the invite. This kinda took me awhile because I wanted it all to line up straight and perfectly and have different fonts for variation. 

After several hours of being meticulous, here's what the invite ended up looking like:


I tried other color options and adding/removing the table, like the picture below. 
The bride liked the dark grey color instead of the turquoise so, we decided to remove 
the table because it was too crowded :(


The next idea I had was to do an invite with just text and then a burlap border. Here's an example of what that one turned out to be like: 


After having two options for the bride to choose from, 
I sent her an image like this one explaining what the differences are between the two options:


The bride liked what I sketched and we decided to go with the tree/chandelier invite! I printed them at OfficeMax (I receive a company discount yea!) and then I went to Paper Source to get the perfect sized and color envelopes! 

All in all, for 40 invitations, I paid just under $27 not including postage! 
I am very happy with the results and price!! 


Tuesday, September 11, 2012

Upcycled: My (Kinda) Blank Canvas

For a little while now I have been carrying around this canvas that was given to me. It was of a tree and was painted by a friend who disliked it after having painted it for her own room. 

Ever since then, I have always wanted to paint something for myself, but I couldn't quite figure out what I wanted to do. 

I have a few things that I want to paint--but out of all of them, this photo of French (I believe it's in French) words on canvas really stuck out to be my favorite.  


Now if you don't know, writing in cursive, with a brush and paint, is very difficult. And I think that's why I chose to go with this one--I wanted a challenge and I wanted to do something meaningful.

Since I speak Italian and love the language, I thought I would do a excerpt in Italian, but then after hearing suggestions from friends and family, I decided to do lyrics from Nickle Creek's song, "Doubting Thomas"--that way I don't always have to translate the text when questioned.

First I had to cover the canvas in white. 
(I left a little blue in areas so that there was a little color variation)


Then I started writing the text in colored pencil and then painted over it with black paint. 

I think I'm really happy with the way it turned out. Of course there are little words that I'm not too excited about with regarding my cursive, but all in all, I like it. 


And I think it looks pretty nice up on my wall :)

The next art piece I want to paint will be on a large rectangle cardboard cutout. 
That one should be fun!


Friday, August 31, 2012

Upcycled: Silver Leafing


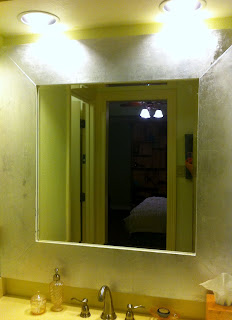
So, I just moved into a new place recently, and I wanted to redo this children's mirror that I received! I decided that I wanted to do a faux mirrored look by attempting to use silver leafing. 


The mirror was really cute, hand painted and all--I just wasn't loving the hot pink walls with the hot pink painted flowers and to be honest, it was time for another craft. So, why not?


First things first, I had to cover up the original painting--so I just used white wall paint. And then after a few hours, I sprayed the wood with a bond spray or adhesive spray--whichever you prefer to call it! After a few minutes of waiting, I started to apply the silver leafing.


I couldn't find this brand above, but Michael's has a brand that is just as good. It comes just like is shown above. To apply the leafing, you seperate the wax paper from the packaging and place the leafing face down on the surface you just put your adhesive on. Then take a paintbrush and brush over the wax before you peel off the wax. Once you slowly peel off the wax, take a sponge paint brush and gently brush over the silver, making sure that all of it has made contact with the adhesive. 


(You can see your brush marks through the leafing)


Continue to follow those steps with each new silver-leafing square until the project area is completed! Once it's completed, wait a few hours until the adhesive has fully bonded with the leafing before applying the sealant. 

Now, here's the part where I had to get creative. My mom and I were being cheap, so we purchased the not-so-expensive brand of sealant and once it dried, it left water-like bubbles which dried into what water residue looks like once it has dried on glass showers... I mean, not so great looking on silver that's supposed to be shinny. 

So, my mom and I got to work, we grabbed water, and two sponges and started scrubbing. The sealant, thankfully started to peel off, but the sponges also took off a little bit of the leafing as well. 


I actually ended up loving the way the sponges made the leafing look antique, so we continued to scrub until we thought it looked it's best. 

Here's what it looks like now :) so much better than before! And, notice the wall color? No more hot pink! 


Tuesday, May 22, 2012

Upcycled: Amy's Painting

When Amy and I became roommates, Amy brought with her a painting that was given to her from her office. This painting wasn't really a painting at all... it was more of a print on a nice canvas and Amy asked me to paint something for her over the original piece. 

I told Amy to pick something out and let me know what she wants me to do. A few days later she came across these two paintings in Nordstrom at the Galleria.


The original painting was orange, brown, blue and white stripes like the image below.


First I had to cover up the lines and mark out the center, then I was able to start painting. 


The painting took me about two weekends... Only because I got frustrated with my artwork and I had this habit of covering up what I didn't like and starting over. I repeated this about three times before I liked what I had done. 


To be totally honest with you, the process of painting something from scratch to resemble a painting was rather difficult. I realized why I hate painting. Amy was a great encourager, but I am too hard on my creations and definitely a perfectionist when it comes to painting in general. 

The final piece is solid brown. Here is a photo of the center.  


All in all I am happy with my work... Just upset about the battle with my perfectionistic painting-self. Maybe one day I will enjoy what I paint and not have to go to battle. 


Saturday, May 19, 2012

New Dresser!! (Not Upcycled)

I mentioned before that I purchased a dresser. Originally I wanted to buy an antique piece and restore it, but in the end I ended up purchasing something that didn't need anything done to it. 

My Mom, Dad, Amy and I drove out to Waxahachie to visit a dealer who was going to sell me something like this: an antique dresser, approximate value ~$350


When we got out there, however, the dresser was probably from the 1950's (instead of "early 1900's"), was missing an original knob and had a different mirror attached to it. Chances are someone a long time ago broke the original mirror and replaced it with another to keep the value and purpose of the piece. 

Luckily we picked up on these things and I did not make the purchase.... It was not worth the listing price. 

Depressed and hungry, we went to the old square and walked around looking (and smelling) for something to eat. We walked into an antique shop called The Dove's Nest and found out that there was a restaurant attached to the side. (Which by the way has fantastic food and is a great idea--Antique shop + restaurant... I want to do that one day!) 

My Mom, Amy and I became distracted by the first booth after entering the store and my Dad walked straight up to this and said, "Elizabeth, I found your dresser!" 


Basically it was love at first sight. It's a mirrored dresser, and I probably paid too much for it, but I love it, so I don't care!


Saturday, May 12, 2012

Upcycled: Push Pin Wall Art

So, this was a little project that I wanted to do after going to an antique home in OKC. I deleted the photo that inspired me, but basically it was an antique frame with center that was burlap over a magnetic center.

I decided that it would be better to do a cork backing, that way we could use push pins and rather than magnets. 

After a few hours of searching for the frame (Note: I found plenty of frames--just not for the price I wanted to pay), I stumbled across Lots of Furniture Antiques Warehouse and was able to negotiate the price for the gold frame below. 


After purchasing the frame, I went to an art store and picked up a canvas that I could carve down to the appropriate size, Target to get the cork backing, and then my parents house to steal a burlap sack that we used to use for sack races. 

I came home, carved the canvas, applied the cork backing and burlap and then nailed in the center to the frame. 

Originally I had kept the frame gold, but then I purchased a mirrored dresser and the gold frame did not look good with the dresser, so I painted it grey. 

Here it is!


Wednesday, May 9, 2012

Upcycled: Old Barn Wood Headboard!

This was an idea I came across one day when I was on Pinterest. I had wanted to make a headboard for the longest time, but I did not know what exactly I was going to do nor how I was going to do it.


The above photo was of a bathroom wall makeover 
and I thought the idea was completely original and unique (at the time).

So, my dad and I carved out some time to go to  Oor-Reed Wrecking Company one Saturday and purchase some reclaimed wood. To my surprise, I was able to purchase all of the wood I would need to build the headboard for less than $50.00!


The most frustrating thing about building the headboard was the frame. My dad and I argued for about twenty minutes on how the frame should be built. I had already drawn up a sketch of my idea of  measurements and such, but he said that I drew a board below where it should go for supporting the weight of the wood. Eventually he won the discussion because I decided I didn't want to risk ruining the wood I just purchased! And he was right, of course!


After building the frame and attaching the backing, I was able to start laying out the design!


And finally after attaching all of the wood pieces, we have a very heavy, reclaimed wood headboard! 
It's awesome!


Here are two photos of it in my room!