Monday, February 25, 2013

Upcycled: The Hutch

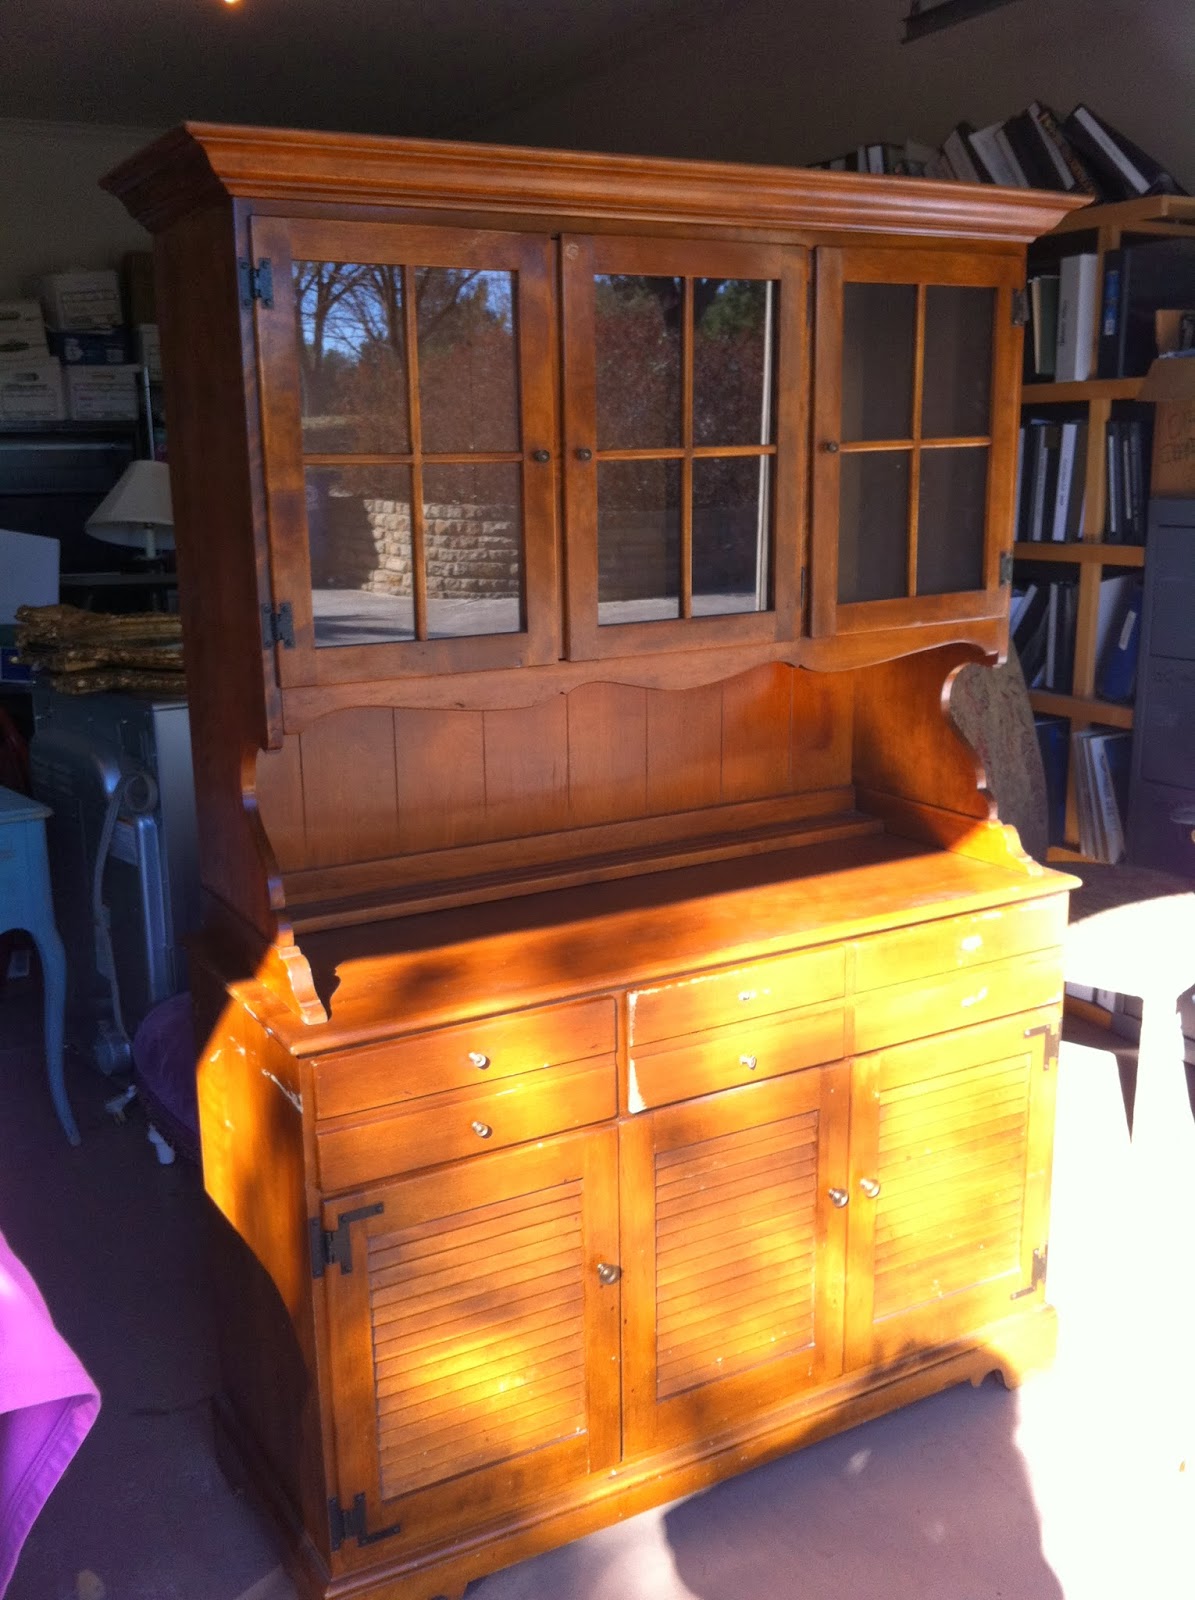
My Grandfather willed me a few of his furniture pieces upon his passing and one of the items was this beautiful Ethan Allen hutch: 


I really loved the natural wood look of the piece, but it didn't quite go with my style and the rest of the furniture in my house, so I decided to "upcycle" it. 

First: sand down the entire surface of the hutch and tape off the parts that you do not want to paint. 

(Originally I wanted to keep the inside of the doors natural wood, but once it was painted, I loved the white so much that I decided to use more paint then less).


After sanding, prime the entire piece, let dry and gently sand again. 
(Photo: white primer)


"Lilly" by Valspar -- my favorite "white" ... it has an off-white feel to it. Not too yellow, not too white. 


After painting all over, sand down the places where you want your piece to look "worn."


Finish off with cute knobs and you're done! Enjoy your new upcylced focus point!! 


Thursday, February 14, 2013

A Little Piece of Texas

My boss gave me a leftover gift basket from the Holidays. This was a "Texas" themed gift basket and therefore it had a Texas shaped body. At first thought, I was thinking I could use it for it's original purpose--as a basket, but then I realized that there's so many other things I could do with it. 


So, I decided to do the "nail-string wrap" that floats around Pinterest since the wood was already in the shape of Texas! 

First Step: Unravel the basket weave. 


Second: after you have you're cut out, paint it whatever color you desire!


The start hammering nails close together. For this I chose #10 carpet nails because they are dark and every nail is just a bit different than the one before! 


Once you're finished with the border, choose the placement (and symbol) of the center holster. 


Tack the symbol in place and then start hammering around the border.  


Once you've completed your center symbol, start to wrap your string. I chose to go with two different types of string: multicolored yarn and I went back over it with a traditional white string (the type that you would use to make a friendship bracelet).


String one is complete! 


String two: I decided to do string one straight and uniform and then string two I decided to go a bit crazy since it was the top layer!


And here's the final result! There's still a few nails I would like to adjust, and I need to fasten hangers on the back, but for now it's messy and unique like me and I'm happy with the turnout! 


Tuesday, February 12, 2013

Wine Crate Shelf @ Wedding


My shelf was used at a wedding this past month! It looked so beautiful in the vestibule with many decorative and commemorative items displayed! 


Thursday, January 24, 2013

Weddings!

It's almost that time of year again--Wedding Season! For me however, it's getting started a little earlier this year. Last year I wrote a post about wedding shower invitations and this weekend is the wedding of the same bride!

I never knew how much work actually goes into planning a wedding until this one because I am the maid of honor and I have had lots of responsibilities in the past few months! 

I've done lots of crafts, gone to tons of meetings, dress fittings and recently I've stayed up way too late crafting. Hopefully it will all be worth it once the day arrives!

Since I've been horrible about taking photos of the crafts, I have only two that I'm allowed to share with you. The bride doesn't want anything to be posted before the wedding because she wants it all to be a surprise!

One of my responsibilities has been decorating the "vestibule" or entrance room to the reception. For this we are using my wine crate shelf and a few other pieces of furniture as decoration. We are also doing photos, painted letters etc., etc. I can't go into detail or else I'd be in trouble, but it's going to look really vintage-chic!

To surprise the Bride and Groom, I have painted them a wedding chapel (we decided against a birdcage). I can't decide if I'm going to put wreaths on the doors or not. 

Here's the before and after!


Next week I will post a bit more showcasing the decorations and handmade items from this wedding!! 

Thursday, January 10, 2013

Christmas Gift Painting

One of my friends asked me this Christmas to make her something to give to her Mom. She had seen my picture of the words on canvas that I had painted several months ago and wanted me to do something similar. Except she said she would like it to be a painting of the Fruits of the Spirit and she gave me specific colors to use. 

I decided, however, that since the Fruits of the Spirit are so short, that it would be better to use different fonts, paints and sizes to take up the canvas she had purchased for me to use. 


I remembered this print I had seen a while back on Pinterest and I decided to show it to her. She said she loved it! 


The only problem was that she had purchased a square canvas instead of a rectangle canvas, so I knew the scale was going to be off a bit and that it wasn't going to be exact. Nevertheless, I decided to go for it! 

I had never painted block letters before. So, I knew this was going to be a challenge for me. If you read my post about the words on canvas, you heard me express the patience it takes to paint words. This one required even more patience!! 

First, I had to sketch out the block letters on the canvas and then I painted the letters one color at a time. 


All in all it took me about 5 hours to paint. Definitely a labor worth doing because I can now say I know all of the Fruits by heart!! 


I don't know if I'm in love with the final product. There was one font in particular that I am not a big fan of. But my friend said that her mom loved it! She paid me probably too much for it, but it was still nice to be commissioned to do something and get paid for it. 

For her moms birthday we are going to build her something out of old barn wood. I'm looking forward to it because wood and I are much better friends that paint and I :)  


Monday, October 29, 2012

Upcycled: Free Logs Turned Into Fantastic Centerpieces & A Present

One of the best things about being nice, is that if you're nice to strangers, 
they will generally be nice back to you :)

I was driving to my boss' house one day and I passed by some guys cutting down a few trees for one of his neighbors. After they cut the tree into smaller pieces, they placed it all into a pile across the street. I parked my car, went over and started asking about the wood--all in hopes of asking the land owner if I could take some of the discarded wood. The workers informed me that the city dump would come by tomorrow and that the wood was mine for the taking. I grabbed three large logs (pictured below) and threw them into my trunk.


A few weeks later, my oldest brother and I spent a few hours with the wood and a chainsaw to cut the logs into 2 1/2-3 inch thick pieces. We got about 18 smaller pieces and three large pieces out of the logs. 


(Pay attention to the tall one of the left--I'm going to use it later on for a gift for the bride and groom)


Here's a close up of the sizes. They all varied because I didn't want the tables to look too uniform--My hope for the dinner party was to make the tables look styled, but individual.

Next, I wanted to create something fun for the bride and groom.The largest leftover piece of wood was too tall to place on top of a table, so I decided to make it into an engraved doorstop for the couple. 


I wanted the doorstop to read "A + J" but I couldn't find my grandfathers' wood engraver, so I resulted to using an old trick that I learned in high school. You can achieve the same look by using regular wood matches. 


First you line up the matches in a row (or in the shape of whatever it is that you're trying to make) and then you use tape to hold the ends together. Try not to get too close to the ends of the match because you do not want to prevent the matches from burning. 


Place the line on the log in the location of the project area.


Set fire to the matches and let it burn for 3-5 seconds. 


Blow it out and remove. You should be left with something that looks like this: 


Continue repeating the steps until you have your final project!!

Here's what mine ended up looking like. The bride and groom loved it! The groom, however, wanted to know what his initial didn't come first haha. 


The dinner party ended up being a big success. My parent's think that event planning/wedding planning is my calling. They might be right. I did have a lot of fun planning and decorating.

Here's a pic of what the tables ended up looking like with all of the flowers, candles and wood cuts :)




Thursday, October 25, 2012

Upcycled: Purple Shirt

I used to work at Anthropologie for a second, part-time job, in addition to my full-time job. I worked there for over a year and a half and I have to say I am so grateful for all of the people who I worked with and all of the inspiration that floats around in the atmosphere. 

One day in the fall of last year, we received this shirt in a new shipment. 


I absolutely fell in love instantly with the colors because it has almost every one of my favorite colors in the pattern. I didn't, however, love the neckline. In fact when I first tried it on, I hated it. Something about having three holes in the chest area (one very deep and low--hint the middle) and I was a little uncomfortable with drawing attention to my chest. I ended up purchasing it because of the color pattern, but only wore it a few times in the past year. It was a few weeks ago that I was cleaning out my closet and I came up with an idea for a neckline adjustment using salvaged materials from things I was going to donate. 


One of the shirts I was going to donate was this babydoll (or long tank) with cream colored lace around the bottom of the shirt. I decided to cut off all of the lace from the tank and then cut out all of the holes on the purple shirt. My hope was to eventually give the purple top a more structured and vintage look.

What I ended up doing was first cutting out a square in the shirt, made what I'm going to call "edging" because I don't know the right terminology and then I attached the lace at the very end.


I think I have decided that I like when things aren't perfect. As you can see, I decided to do a zigzag pattern for the stitch and I used bright purple thread all so that the neckline would stand out a little more. The edging also isn't perfect because I made it all from teeny-tiny scraps from the square cut-out and then I also salvaged the edging from the original holes.  

After two hours on the sewing machine, I came up with this:

(I wore it to work this week and snapped this photo in the bathroom!)


All in all I am very happy with how it turned out. I love the colors and now it has a very unique neckline that doesn't draw attention to the crack between my boobs! Hah!