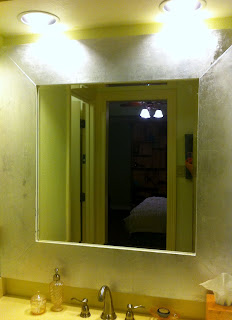
So, I just moved into a new place recently, and I wanted to redo this children's mirror that I received! I decided that I wanted to do a faux mirrored look by attempting to use silver leafing.
The mirror was really cute, hand painted and all--I just wasn't loving the hot pink walls with the hot pink painted flowers and to be honest, it was time for another craft. So, why not?
First things first, I had to cover up the original painting--so I just used white wall paint. And then after a few hours, I sprayed the wood with a bond spray or adhesive spray--whichever you prefer to call it! After a few minutes of waiting, I started to apply the silver leafing.
I couldn't find this brand above, but Michael's has a brand that is just as good. It comes just like is shown above. To apply the leafing, you seperate the wax paper from the packaging and place the leafing face down on the surface you just put your adhesive on. Then take a paintbrush and brush over the wax before you peel off the wax. Once you slowly peel off the wax, take a sponge paint brush and gently brush over the silver, making sure that all of it has made contact with the adhesive.
(You can see your brush marks through the leafing)
Continue to follow those steps with each new silver-leafing square until the project area is completed! Once it's completed, wait a few hours until the adhesive has fully bonded with the leafing before applying the sealant.
Now, here's the part where I had to get creative. My mom and I were being cheap, so we purchased the not-so-expensive brand of sealant and once it dried, it left water-like bubbles which dried into what water residue looks like once it has dried on glass showers... I mean, not so great looking on silver that's supposed to be shinny.
So, my mom and I got to work, we grabbed water, and two sponges and started scrubbing. The sealant, thankfully started to peel off, but the sponges also took off a little bit of the leafing as well.
I actually ended up loving the way the sponges made the leafing look antique, so we continued to scrub until we thought it looked it's best.
Here's what it looks like now :) so much better than before! And, notice the wall color? No more hot pink!


